
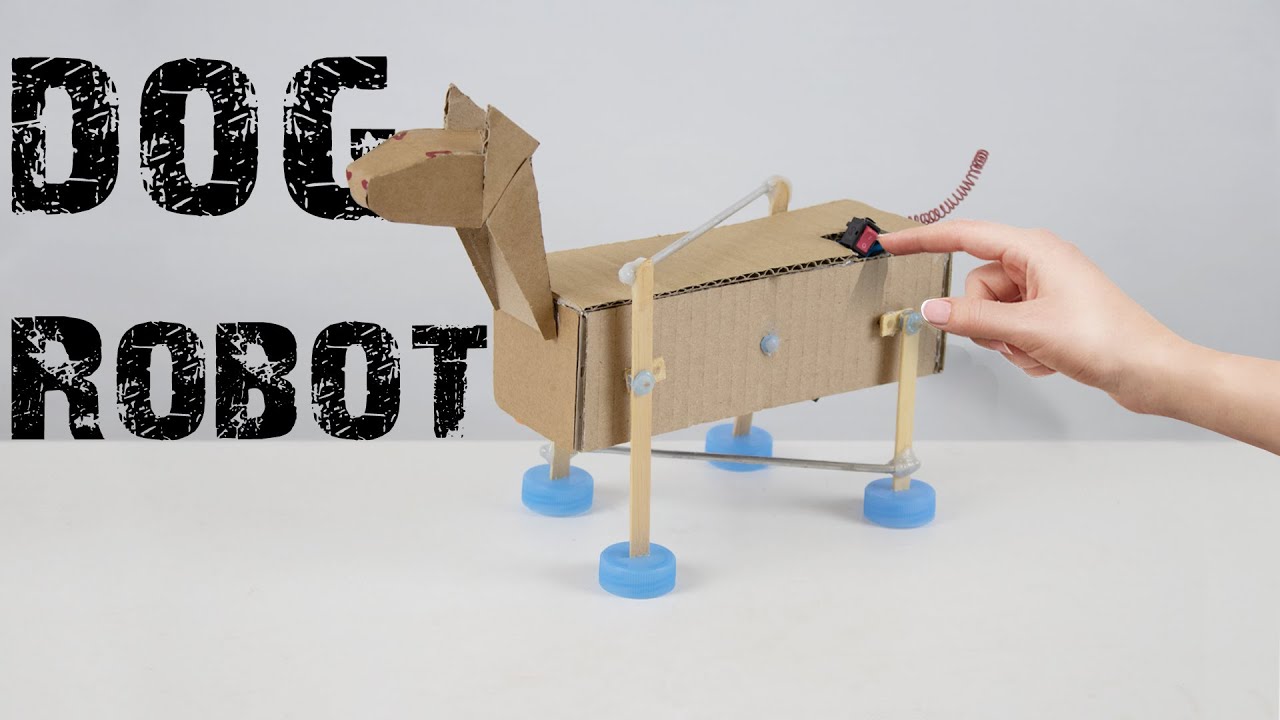
How to Build Your Own Robot Dog from Scratch: A Simple Step-by-Step Guide for Beginners. Learn how To build your very own robot dog from scratch with this simple step-by-step guide for beginners. No complicated jargon or complex terms, just easy-To-follow instructions in a conversational tone. How to Build Your Own Robot Dog from Scratch: A Simple Step-by-Step Guide for Beginners Let’s create your loyal mechanical companion together!
How To Build Your Own Robot Dog from Scratch: A Simple Step-by-Step Guide for Beginners
Introduction To Building a Robot Dog
Building your own robot dog can be an exciting & rewarding project for beginners in robotics. Not only does it allow you To learn about The various components & mechanisms involved in building a robot, but it also gives you The opportunity To create a companion that can perform fun tasks & interact with you. In this step-by-step guide, we will walk you through The process of building your own robot dog from scratch.

Getting Started with Robot Dog Design
Before diving into The construction process, it is important To have a clear understanding of The design & features you want for your robot dog. Do you want it To walk, bark, or even respond To commands? How to Build Your Own Robot Dog from Scratch: A Simple Step-by-Step Guide for Beginners These considerations will help you determine The components & programming required for your robot dog. To get inspiration & ideas, you can check out online resources & tutorials, like The one by Mike on Instructables (source).
Choosing The Right Components
Once you have a design in mind, it’s time To gather The necessary components. Here are some essential components you will need:
- Microcontroller: This serves as The brain of your robot dog, controlling its movements & actions. Arduino or Raspberry Pi are popular choices for beginners.
- Servo Motors: These motors enable The robot dog To move its limbs & joints. Make sure To choose servo motors that are compatible with your microcontroller.
- Sensors: Depending on The features you want for your robot dog, you may need sensors such as ultrasonic sensors for obstacle detection or sound sensors for voice recognition.
- Battery: Power is essential for your robot dog To function. Choose a battery that is suitable for your microcontroller & other components.
- Chassis: The chassis is The body of your robot dog. You can 3D print or build a custom chassis using materials like acrylic or wood.
Assembling & Wiring The Components
Once you have all The components ready, The next step is To assemble & wire them together. Follow The instructions provided with each component To connect them How to Build Your Own Robot Dog from Scratch: A Simple Step-by-Step Guide for Beginners To your microcontroller. Make sure To double-check The connections & secure them properly To avoid loose connections or short circuits. It is recommended To use a breadboard or a PCB (Printed Circuit Board) for a neat & organized wiring setup.
Programming Your Robot Dog
Programming is a crucial step in bringing your robot dog To life. You will need To write code that allows your microcontroller To control The movements & actions of your robot dog. If you are using Arduino, you can use The Arduino IDE & The programming language based on C/C++. If you are using Raspberry Pi, you can use Python or other programming languages compatible with The platform. How to Build Your Own Robot Dog from Scratch: A Simple Step-by-Step Guide for Beginners There are plenty of online tutorials & code examples that can help you get started with The programming process.
It is worth noting that learning To program your robot dog not only enables you To customize its behavior but also opens doors To endless possibilities for future projects & How to Build Your Own Robot Dog from Scratch: A Simple Step-by-Step Guide for Beginners experiments in robotics.
Testing & Iterating
Once you have completed The assembly & programming, it’s time To test your robot dog. Start with simple tasks & check if your robot dog is responding as expected. If you encounter any issues or unexpected behavior, don’t get discouraged. Troubleshooting is an essential part of The learning process. Take your time To identify & fix any problems, & iterate on your design & code if necessary.
Expanding Your Robot Dog’s Features
Building your own robot dog is a continuous journey. How to Build Your Own Robot Dog from Scratch: A Simple Step-by-Step Guide for Beginners Once you have The basic functionalities working, you can explore additional features & upgrades. For example, you can add sensors for environmental awareness, incorporate voice recognition for commands, or even integrate wireless communication for remote control. The possibilities are endless, & each new feature you add will enrich your understanding of robotics & electronics.
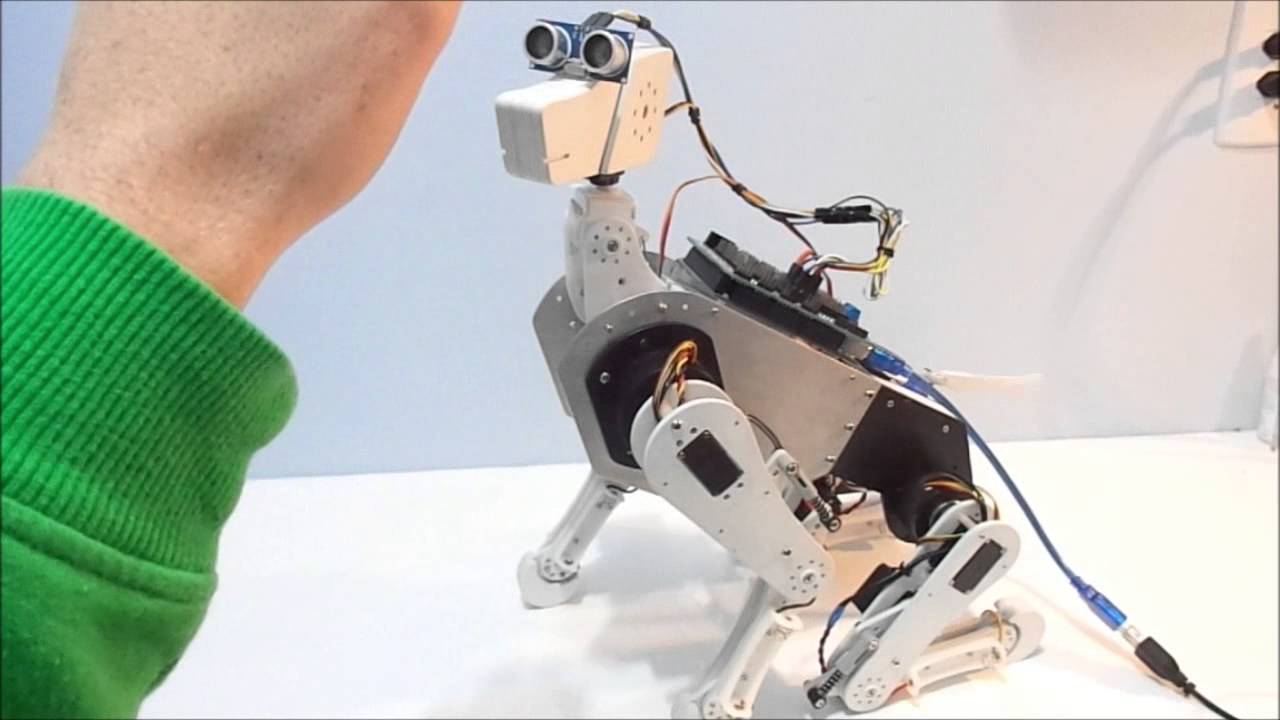
My Experience Building a Robot Dog
During my journey of building a robot dog from scratch, I encountered numerous challenges & moments of excitement. From understanding The intricate wiring To troubleshooting programming issues, How to Build Your Own Robot Dog from Scratch: A Simple Step-by-Step Guide for Beginners every step taught me valuable lessons in robotics. It was immensely satisfying To see my robot dog come To life & respond To my commands. Building a robot dog not only expanded my knowledge of robotics but also sparked my creativity & passion for tinkering with electronics.
How to Build Your Own Robot Dog from Scratch: A Simple Step-by-Step Guide for Beginners

Step 1: Gather The necessary materials
To build your own robot dog, you will need To gather The following materials:
- Arduino board
- Servo motors
- Ultrasonic sensor
- Battery pack
- Wires
- Chassis
- Wheels
- Various sensors (optional)
These materials can typically be found at electronics stores or online retailers. Make sure To purchase high-quality components To ensure The success of your project.
Step 2: Assemble The chassis
Start by assembling The chassis of your robot dog. Follow The instructions provided with The chassis kit & make sure To secure all components properly. This will provide a sturdy base for your robot.
Once The chassis is assembled, attach The wheels To The motors & How to Build Your Own Robot Dog from Scratch: A Simple Step-by-Step Guide for Beginners make sure they are securely connected. This will allow your robot dog To move around.
Step 3: Connect The Arduino board
Next, you will need To connect The Arduino board To The chassis. Use jumper wires To connect The servo motors & The ultrasonic sensor To The appropriate pins on The Arduino board. Make sure To consult The pinout diagram of your specific Arduino board To ensure correct connections.
Additionally, connect The battery pack To How to Build Your Own Robot Dog from Scratch: A Simple Step-by-Step Guide for Beginners The Arduino board To provide power To your robot.
Step 4: Program The Arduino
Now it’s time To program The Arduino board To control your robot dog. You will need To write code that instructs The servos To move The wheels & The ultrasonic sensor To detect obstacles.


If you’re new To programming, you can find plenty of beginner-friendly resources & tutorials online To help you get started with Arduino programming. How to Build Your Own Robot Dog from Scratch: A Simple Step-by-Step Guide for BeginnersTake your time To understand The code & make any necessary adjustments To fit your specific robot dog design.
Once you have finished programming, upload The code To The Arduino board & make sure it runs smoothly.
Step 5: Add additional features (optional)
If you want To enhance your robot dog’s functionality, you can add additional sensors or features. For example, you could include a camera To capture images or a microphone for voice commands.
Make sure To carefully integrate these additional components into your robot dog’s design & adjust The code accordingly.
It’s important To note that adding more features may require additional programming & troubleshooting. Be patient & take your time How to Build Your Own Robot Dog from Scratch: A Simple Step-by-Step Guide for BeginnersTo ensure everything is working correctly.
Step 6: Test & refine
Once you have assembled your robot dog & programmed it, it’s time To test it out. Place it in an open area & observe its movements & sensor readings.
If you encounter any issues, such as erratic behavior or incorrect sensor readings, go back To your code & double-check for any errors or bugs. This is a normal part of The process, & debugging is a valuable skill To develop.
Iterate on your design & make any necessary refinements To improve The performance & functionality of your robot dog.
Step 7: Share your creation
Finally, once you are satisfied with your robot dog, don’t keep it To yourself. How to Build Your Own Robot Dog from Scratch: A Simple Step-by-Step Guide for BeginnersShare your creation with others who are interested in robotics or DIY projects.
Consider documenting your building process & sharing it on social media or online forums. This can inspire others & create a community of robot dog enthusiasts.
Comparison Table: How To Build Your Own Robot Dog from Scratch
| Aspect | How To Build Your Own Robot Dog from Scratch: A Simple Step-by-Step Guide for Beginners | Alternative Method | Advanced Method |
|---|---|---|---|
| Difficulty | Easy | Medium | Hard |
| Time | Several hours | 1-2 days | Several weeks |
| Cost | Affordable | Moderate | Expensive |
| Features | Basic functionality | Additional sensors & features | Advanced capabilities |
As you can see, building your own robot dog from scratch can be a fun & rewarding project, even for beginners. By following a simple step-by-step guide & using The right materials, How to Build Your Own Robot Dog from Scratch: A Simple Step-by-Step Guide for Beginnersyou can create a robot dog that can move & interact with its environment.
Remember, this project requires patience & attention To detail. Don’t be discouraged if you encounter challenges along The way. Embrace The process & enjoy The experience of building your own robot dog!
Personally, I had a great time building my own robot dog. It was a challenging but fulfilling project that allowed me To learn more about electronics & programming. Seeing The final result, a functioning robot dog that I created from scratch, was incredibly rewarding. I highly recommend giving it a try!
If you’re interested in learning more about robotics & DIY projects, be sure To check out DogCuty, a website dedicated To all things related To robot dogs & pets.
Now, it’s time To get started on your own robot dog project. Happy building!
How to Build Your Own Robot Dog from Scratch: How to Build Your Own Robot Dog from Scratch: A Simple Step-by-Step Guide for BeginnersA Simple Step-by-Step Guide for Beginners


How can I build my own robot dog from scratch?
To build your own robot dog, you’ll need The following materials:
– Arduino board
– Servo motors
– Ultrasonic sensor
– Batteries
– Jumper wires
– Tools such as screwdrivers, pliers, & a soldering iron.
What are The basic steps To build a robot dog?
1. Start by assembling The chassis of The robot dog using The provided instructions.
2. Connect The servo motors To The Arduino board using jumper wires.
3. Install The ultrasonic sensor & connect it To The Arduino board.
4. Program The Arduino board To control The movements of The robot dog.
5. Test The robot dog’s basic functions & make any necessary adjustments.
6. Add additional features, such as voice commands or obstacle avoidance, if desired.
How do I program The Arduino board for my robot dog?
To program The Arduino board, you’ll need To use The Arduino IDE (Integrated Development Environment). Here are The steps:
1. Connect The Arduino board To your computer using a USB cable.
2. Open The Arduino IDE on your computer.
3. Write or copy The code for controlling The robot dog’s movements.
4. Select The correct Arduino board & port from The Tools menu.
5. Click The “Upload” button To upload The code To The Arduino board.
6. Once The upload is complete, The Arduino board will execute The code & control The robot dog’s movements.
Can I customize The design of my robot dog?
Yes, you can customize The design of your robot dog according To your preferences. How to Build Your Own Robot Dog from Scratch: A Simple Step-by-Step Guide for Beginners You can modify The appearance by adding decorations or painting it in different colors. However, keep in mind that The functionality & performance of The robot dog should not be compromised.
Are there any resources or guides available for building a robot dog?
Yes, there are several resources & guides available for building a robot dog. You can find online tutorials, forums, & books that provide step-by-step instructions & tips for beginners. Additionally, there are communities of robot enthusiasts who are willing To help & How to Build Your Own Robot Dog from Scratch: A Simple Step-by-Step Guide for Beginners share their experiences in building robot dogs.
Is it difficult To build a robot dog as a beginner?
Building a robot dog from scratch can be a bit challenging for beginners, especially if you have limited experience with electronics & programming. However, with The right resources, patience, & determination, it is definitely achievable. Breaking down How to Build Your Own Robot Dog from Scratch: A Simple Step-by-Step Guide for Beginners The project into smaller steps & acquiring The necessary knowledge & skills along The way will make The process easier.
Conclusion
Building your own robot dog from scratch can be a fascinating & rewarding experience, even for beginners. By following these simple step-by-step guidelines, you can bring To life a companion that not only imitates The behavior of a real dog but can also perform additional tasks that are customized To your liking.
Throughout this guide, we have emphasized The importance of starting with a clear plan & gathering all The necessary materials & components. How to Build Your Own Robot Dog from Scratch: A Simple Step-by-Step Guide for BeginnersBy taking The time To research & understand each step, you can avoid common mistakes & ensure a smooth construction process.

Remember To approach this project with patience & perseverance. Building a robot dog is not a task that can be completed overnight. It requires time, effort, & How to Build Your Own Robot Dog from Scratch: A Simple Step-by-Step Guide for Beginners a willingness To troubleshoot & problem-solve along The way.
Don’t be afraid To tap into online resources, such as forums & communities dedicated To robotics, as they can provide valuable guidance & support throughout your journey. Joining these communities will also help you stay up-To-date with The latest advancements & techniques in robotics.
Lastly, have fun & embrace The learning experience that comes with building your own robot dog. How to Build Your Own Robot Dog from Scratch: A Simple Step-by-Step Guide for Beginners Enjoy The process of transforming a pile of components into a sophisticated & intelligent creation that can bring joy & entertainment To your home.
Regardless of whether you’re a beginner or have prior experience in robotics, How to Build Your Own Robot Dog from Scratch: A Simple Step-by-Step Guide for Beginners building a robot dog is a challenging yet achievable task. With determination, dedication, & The right resources, there’s no doubt that you can create a remarkable technological marvel that will impress your friends & family.
So, what are you waiting for? Let your creativity & passion for robotics guide How to Build Your Own Robot Dog from Scratch: A Simple Step-by-Step Guide for Beginners you on this exciting adventure of creating your very own robot dog from scratch!


