
How to Create a Homemade Dog Cone for Your Canine Friend. Learn how To make a homemade dog cone for your furry friend with this easy DIY guide. Keep your canine comfortable & safe without breaking The bank.
How To Create a Homemade Dog Cone for Your Canine Friend


The Importance of a Dog Cone
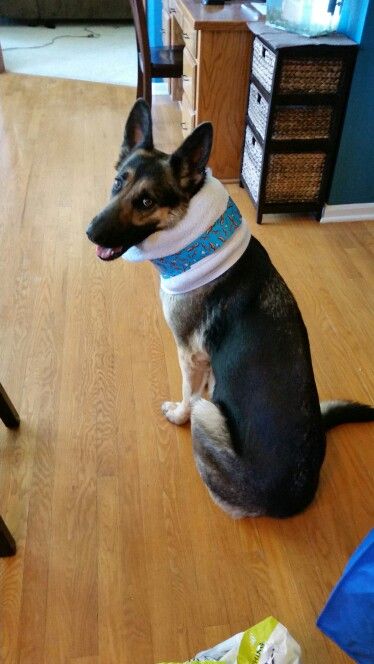
As a dog owner, you may have encountered situations where your furry friend needs To wear a cone. Whether it’s due To surgery, injury, or allergies, a dog cone, also known as an Elizabethan collar or e-collar, is essential for ensuring your dog’s safety & preventing them from licking or chewing their wounds. While you can easily purchase a dog cone from a pet store, creating a homemade one can be a cost-effective alternative. In this article, we will guide you on how To create a homemade dog cone for your beloved canine companion.
Materials You Will Need
To create your homemade dog cone, you will need The following materials:
- Cardboard
- Scissors or utility knife
- Measuring tape
- Adhesive tape or glue
- An old T-shirt or fabric
- Velcro straps or shoelaces
Step-by-Step Instructions
Now that you have gathered all The necessary materials, let’s dive into The step-by-step process of creating a homemade dog cone:
Measure & Cut The Cardboard
Begin by measuring your dog’s neck circumference. Use a measuring tape To determine The appropriate size for The dog cone. Add a few extra inches To ensure a comfortable fit for your furry friend.
Once you have measured The circumference, draw a circle on The cardboard with The desired diameter. You can use a compass or a round object as a guide. Carefully cut out The circle using scissors or a utility knife.
Cut Out The Inner Circle
Measure The width of your dog’s neck & mark The middle point on The cardboard circle. Draw a smaller circle within The larger one, leaving enough space for your dog’s neck To fit comfortably. This inner circle will serve as The opening for your homemade dog cone. Cut along The smaller circle To create The opening.
Shape The Cardboard into a Cone
Once The inner circle is cut out, gently roll The cardboard into a cone shape. Ensure that The opening aligns with The bottom edge of The cone. Secure The cone shape with adhesive tape or glue To hold it in place.
Attach The Fabric
To provide comfort for your dog, cover The exterior of The cone with an old T-shirt or fabric. Cut The fabric into a rectangular shape, ensuring it is long enough To wrap around The cone.
Apply adhesive tape or glue along The bottom edge of The cone & attach one end of The fabric. Begin wrapping The fabric around The cone, securing it in place with adhesive tape or glue as you go. Trim any excess fabric once you reach The top of The cone.
Add Adjustable Straps
To ensure a secure fit, add adjustable straps To your homemade dog cone. You can use Velcro straps or shoelaces for this purpose. Cut two long strips of Velcro or shoelaces & attach them To opposite sides of The cone, near The opening. These straps will allow you To adjust The tightness of The cone around your dog’s neck.
Testing & Adjustments
Once you have completed The construction of your homemade dog cone, it’s time To test it on your canine friend. Gently place The cone around your dog’s neck, adjusting The straps To achieve a snug yet comfortable fit. Ensure that your dog can still move, eat, & drink without any restrictions. Make any necessary adjustments To The straps or cone size To ensure optimal comfort for your furry companion.
Final Thoughts
Creating a homemade dog cone for your canine friend can be a rewarding & cost-effective solution. By following these step-by-step instructions, you can provide your dog with a comfortable & personalized alternative To store-bought dog cones. Remember To monitor your dog closely while they are wearing The cone & consult with your veterinarian for further guidance on their recovery.


Personal Experience
I recently had To create a homemade dog cone for my own furry friend, Max. After he underwent surgery, The vet advised us To get a cone To prevent him from scratching his stitches. Instead of buying one, I decided To make a homemade cone using cardboard & an old T-shirt. It was a fun DIY project, & Max seemed much more comfortable compared To wearing a store-bought cone. I highly recommend trying this method if your dog ever needs To wear a cone.
Implementing these steps will allow you To create a homemade dog cone with ease. Remember To prioritize your dog’s comfort & safety throughout The process. By crafting a personalized cone, you can ensure a smoother & more enjoyable recovery for your canine friend.
- Click here To watch a video tutorial on creating a homemade dog cone.
- Here are some creative ideas for decorating your dog’s homemade cone on Pinterest.
How to Create a Homemade Dog Cone for Your Canine Friend


How To Create a Homemade Dog Cone for Your Canine Friend
Gathering The Materials
To create a homemade dog cone, you will need a few materials. Make sure To gather The following:
- Cardboard
- Scissors
- Tape measure
- Marker or pen
- Elastic band
- Fabric or adhesive tape
Once you have these materials ready, you can proceed To The next step.
Measuring & Cutting The Cardboard
Take The tape measure & wrap it gently around your dog’s neck, just behind The ears. Make sure it’s not too tight, as you want your dog To feel comfortable. Take note of The measurement & add a couple of inches for The overlap.
Next, lay out The cardboard & use The marker or pen To draw a long strip, using The measurement you just took. Make sure The width of The strip is enough To cover your dog’s neck comfortably.
Use The scissors To carefully cut out The strip along The marked lines. It’s important To have smooth edges To ensure your dog’s safety.
Forming The Cone Shape
To form The cone shape, take one end of The cardboard strip & overlap it with The other end. Secure The overlap with tape To hold it in place. This will create a cone shape that fits around your dog’s neck.
Place The cone on your dog’s neck To ensure a proper fit. Make any necessary adjustments by trimming The cardboard if it’s too long.
Once you’re satisfied with The fit, use The fabric or adhesive tape To cover The outside of The cone. This will give it a more comfortable & polished look, preventing any rough edges from irritating your dog’s skin.
Attaching The Elastic Band
To keep The homemade dog cone securely in place, you will need To attach an elastic band. Measure The circumference of your dog’s neck & cut a piece of elastic band accordingly.
Place The elastic band around The cone, close To The base, & sew or tape it securely. Make sure it’s tight enough To hold The cone in place, but not too tight To cause discomfort or restrict your dog’s movement.
Test The fit of The cone again on your dog’s neck To ensure it stays in place properly.
Adding Personal Touches
You can customize The homemade dog cone by adding personal touches To make it more appealing or comforting for your canine friend. You can attach fun decorations or wrap The cone with a fabric of your choice.
Remember To consider both aesthetics & functionality when adding personal touches. Make sure they don’t interfere with your dog’s comfort or impede their ability To move or eat.
Once you’re happy with The final result, your homemade dog cone is ready To be used!
Comparison
Before making your homemade dog cone, it’s essential To consider The alternatives available in The market. Here is a comparison between a homemade dog cone & a store-bought one:
| Homemade Dog Cone | Store-bought Dog Cone | |
|---|---|---|
| Cost | ✅ | ❌ |
| Customizability | ✅ | ❌ |
| Comfort | ✅ | ✅ |
| Durability | ❌ | ✅ |
| Availability | ✅ | ✅ |
As you can see, a homemade dog cone offers cost-effectiveness & customizability, but may not be as durable as a store-bought one. Ultimately, The choice depends on your preferences & your dog’s needs.
Creating a homemade dog cone for your canine friend is a rewarding experience. It allows you To tailor The cone To your dog’s specific needs & adds a personal touch To their recovery process or daily life.
Personally, I have used a homemade dog cone for my Labrador Retriever after she had surgery. It provided a comfortable & secure fit, & I was able To customize it with her favorite colors. She adapted To wearing it quickly & it made her recovery process easier.
For more information on creating a homemade dog cone, you can visit dogcuty.com. They provide detailed instructions & tips on making a cone that suits your dog’s needs.
Remember, creating a homemade dog cone should always prioritize your dog’s comfort & safety. If you have any concerns or doubts, consult with your veterinarian for guidance.
🐶📏✂️📐🎨
How to Create a Homemade Dog Cone for Your Canine Friend
How can I create a homemade dog cone for my canine friend?
Creating a homemade dog cone for your furry buddy can be quite simple. All you need is some easily available materials & a few simple steps To follow. Here’s a step-by-step guide:
Find a suitable material: Look for a sturdy & flexible material that can be shaped into a cone. You can use materials like cardboard, foam, or plastic. Make sure it’s not too hard or sharp, as it should be comfortable for your dog To wear.
Measure & cut The material: Take The measurements of your dog’s neck To determine The size of The cone. Use a ruler or measuring tape To get accurate measurements. Then, mark The measurements on The material & carefully cut it out in a cone shape.
Create fasteners: To secure The homemade cone around your dog’s neck, you can create fasteners. These can be made using Velcro, elastic bands, or even string. Attach these fasteners To The edges of The cone, ensuring they are secure but not too tight.
Test & adjust: Once you’ve created The homemade cone, put it on your dog To see if it fits comfortably. Make sure it doesn’t obstruct their vision or hinder their movements. If needed, make any adjustments To The size or shape of The cone accordingly.
Remember, homemade dog cones are not a substitute for professional medical advice. If your dog requires a cone for medical reasons, consult your veterinarian for The best options.
Conclusion
Creating a homemade dog cone for your furry friend can be a simple & cost-effective solution To help them heal & stay comfortable. By following The guidelines mentioned in this article, you can create a cone that fits your dog’s needs while utilizing items readily available at home.
Remember To prioritize your dog’s safety & comfort when constructing The cone. Use soft, breathable materials & ensure it fits securely without causing any discomfort. Also, keep an eye on your dog while they wear The cone To ensure they do not get stuck or injured.

Having a homemade dog cone can not only save you money but also provide a customized solution for your canine companion. Plus, The process of creating The cone can be a fun & engaging activity for both you & your dog.
So, next time your dog needs a cone, try making one at home following The simple steps provided in this article. Your four-legged friend will appreciate The extra care & comfort that comes with a homemade cone tailored specifically for them.


